How to Repair a Leaky Delta Kitchen Faucet | Step By Step Guide
A leaky kitchen faucet is more than just an annoying drip. It wastes water, increases utility bills, and can slowly damage cabinets and countertops. Delta kitchen faucets are widely used in apartments, rental units, and owner-occupied flats because of their reliable design and long lifespan. Still, even high-quality faucets can develop leaks over time.
This guide explains how to repair a leaky Delta kitchen faucet in a clear and practical way. It is written for people living in apartments, whether they are renting the unit or own it. The steps shared here focus on safe, non-destructive repairs that work well in apartment settings and do not require advanced plumbing skills.
Why Delta Kitchen Faucets Commonly Leak
Before learning how to repair a leaky Delta kitchen faucet, it helps to understand why the leak starts. In most cases, the problem is internal and related to wear rather than misuse.
Delta faucets usually rely on a cartridge system instead of traditional rubber washers. Over time, this cartridge can wear out or become clogged with mineral deposits. Hard water is common in many apartment buildings and often accelerates this process. Loose handles, worn O-rings, and buildup inside the faucet body are also frequent causes of leaks.
Things to Consider in Apartments Before Repairing
When repairing a leaky Delta kitchen faucet in an apartment, it is important to think responsibly. Renters should avoid making permanent plumbing changes, while apartment owners should consider shared plumbing systems within the building.
Always start with repairs that are reversible, such as tightening parts, cleaning components, or replacing a cartridge with the same model. If shut-off valves are not accessible or the leak seems severe, contacting building maintenance or a plumber is the safer option.
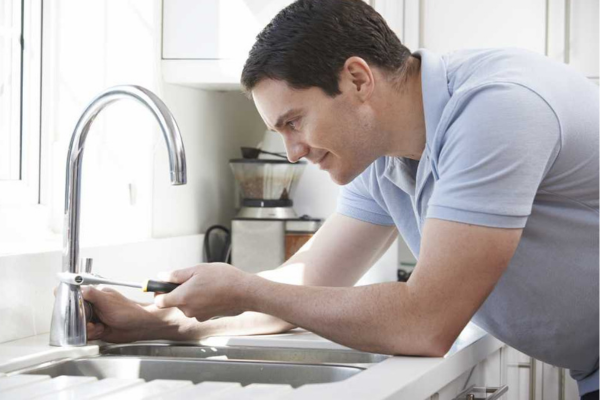
Tools Needed to Repair a Leaky Delta Kitchen Faucet
You do not need professional plumbing tools to repair a leaky Delta kitchen faucet. Most repairs can be completed using basic household items.
Typical tools include a screwdriver, Allen wrench, adjustable wrench, soft cloth, towel, and a replacement Delta cartridge if required. Using original Delta replacement parts helps ensure proper fitting and long-term results.
Step 1: Turn Off the Water Supply
The first step in learning how to repair a leaky Delta kitchen faucet is shutting off the water. In apartments, shut-off valves are usually located under the kitchen sink.
Turn both hot and cold water valves clockwise until they stop. Open the faucet to release any remaining pressure. This step prevents accidental spills and protects surrounding surfaces from water damage.
Step 2: Remove the Faucet Handle Carefully
To repair a leaky Delta kitchen faucet, the handle must be removed. Most Delta faucets have a small screw hidden beneath a decorative cap.
Use the correct tool to loosen the screw and gently lift the handle. Take your time and avoid scratching the faucet finish, especially in rental apartments where fixture condition matters.
Step 3: Access and Remove the Cartridge
Once the handle is removed, the cartridge becomes visible. Many Delta models use a retaining clip to hold the cartridge in place.
Carefully remove the clip and pull the cartridge straight out. If it feels stuck, gently wiggle it without using force. Damaging the faucet body can make the problem worse and lead to costly repairs.
Step 4: Inspect the Cartridge and O-Rings
Inspection is a key part of repairing a leaky Delta kitchen faucet. Look closely at the cartridge and O-rings for cracks, wear, or stiffness.
If the parts appear worn or damaged, replacement is recommended. If they are intact but covered in mineral deposits, cleaning may be enough to stop the leak.
Step 5: Clean Mineral Buildup Inside the Faucet
Mineral buildup is a common issue in apartments with hard water. Cleaning the internal parts can often fix a leak without replacing components.
Use a soft cloth and white vinegar to clean the cartridge and faucet interior. Avoid harsh chemicals that may damage seals or finishes. Proper cleaning restores smooth water flow and improves sealing.
Step 6: Replace the Cartridge if Necessary
If cleaning does not resolve the issue, replacing the cartridge is the most effective way to repair a leaky Delta kitchen faucet.
Insert the new cartridge carefully, ensuring it is aligned correctly. Secure it with the retaining clip and confirm it sits firmly in place. This repair is usually acceptable in both rental and owner-occupied apartments.
Step 7: Reassemble the Faucet
After the cartridge is installed, reattach the handle and tighten the screw gently. Over-tightening can cause damage or affect handle movement.
Make sure the handle turns smoothly and feels stable. A properly assembled faucet reduces the risk of future leaks.
Step 8: Turn the Water Back On and Test
Slowly turn the water supply back on and open the faucet. Let water run for a short time while checking for leaks around the handle and base.
If the dripping has stopped, the repair was successful. If not, double-check cartridge alignment and connections.
Temporary Solutions for Ongoing Leaks
If you are unable to fully repair a leaky Delta kitchen faucet immediately, temporary steps may help reduce water waste. Tightening loose components and cleaning visible buildup can minimize dripping.
However, temporary fixes should not replace proper repair, especially in apartments where long-term leaks can cause damage to shared structures.
When to Call Maintenance or a Plumber
Some situations require professional help. If the faucet body is cracked, water shut-off valves do not work, or leaks persist after cartridge replacement, stop repairing.
In rental apartments, report the issue to management. Apartment owners should contact a licensed plumber to avoid damage to neighboring units.
How to Prevent Future Faucet Leaks
Preventing leaks is easier than repeated repairs. Avoid forcing the handle, clean the faucet regularly, and address small drips early.
Routine care extends the life of Delta kitchen faucets and reduces maintenance issues in apartment living.
Conclusion
Understanding how to repair a leaky Delta kitchen faucet can save water, reduce costs, and prevent damage in apartments. Most leaks are caused by worn cartridges, loose parts, or mineral buildup and can be fixed with basic tools and careful steps.
Whether you live in a rented apartment or own your unit, responsible faucet repair helps maintain a comfortable and well-kept kitchen. When problems go beyond simple fixes, professional support is always the safest choice.